Hello everyone! I hope you all have had a wonderful weekend and enjoyed whatever you were doing. LA wasn’t as sunny as I was hoping for, so I’ve been doing some creative things in our apartment instead.
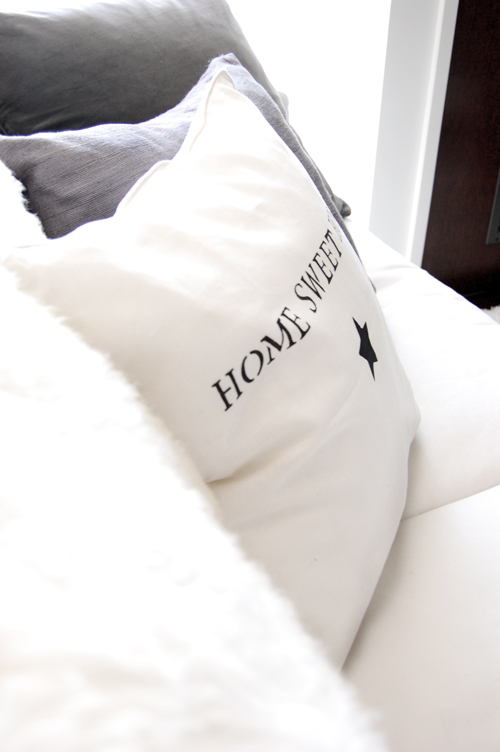
I have seen that many of you have these cute pillows with letters and phrases on them, and I wanted to have something similar. So I went over to Ikea and bought a white linen pillow, and I pimped it up with “Home sweet home” and a cute little star.
I already had letter stencils, so I painted the words that I wanted with acrylic paint ( You take what you have, right? * smile* I’m sure there are better options when it comes to paint… )
I started with the word in the middle, because I wanted it to end up centred. I also put some paper underneath so the paint didn’t go through to the other side of the pillow.
Have you made any pillows like this, or do you prefer to buy them?

I wish you all a great new week!

Images: Nina Holst

I have to show you this gorgeous wine rack, because I know that many of your are quite handy, so maybe this wine rack is something that you might want to challenge yourself with? As I’ve said before,
wood is the hottest trend right now, so I guess this wine rack would make your home super trendy!

It seems to me that the rack is made of beams that are glued or screwed together, and the holes should be possible to make with a drill – it shouldn’t be that difficult, right?

Oh, and notice the wooden crate and the bench – just lovely!
Lots of ideas to steal from this room I guess * smile *

Do you think it would be difficult to make one of these wine racks?

Have a wonderful Sunday!

Images: Alvhem

Norwegian Interior Blogs (NIB) have a new challenge on their website this November, and this time they want us to submit pictures of our flea market finds. I love going to flea markets to search for those hidden treasures, so challenge accepted *smile*. I have however still not found those big furniture items that I’m hoping to find yet, but I know they are out there somewhere.
So for now I would like to share with you three of my latest finds that I’m very happy with…
 
( My three best finds: An antler, a wooden Coca Cola crate and an old frame that I have painted )
What are your best flea market finds?
I would love to hear about them, and hopefully I can see a picture of them in the NIB challenge.
Have a great Saturday everyone! I have plans to lay out in the sun this Saturday, if the sun comes out…

Images: Nina Holst

Yesterday I was a guest writer on Design Refuge, and I shared some ideas on how you can make non-traditional candle decorations that are related to fall. We all like to light more candles now that we have darker nights, right? So why not get creative with vegetables – they can be very decorative!

As you can see, I used a small pumpkin, an artichoke and some asparagus to get a cosy fall-looking decoration.

How to make them:

1. Artichoke: Cut off the bottom of the artichoke so that it stands better on the table. Then pull out or cut away the leaves from the top, until you get a hole that fits the candle. Now you can place the block candle in the middle.

2. Asparagus: Cut the asparagus in appropriate lengths. Put them close together around the block candle, and hold it all together with your hand before you attach the twine.


3. Pumpkin: Cut a hole in the middle of the pumpkin before you place the candle. When you are at the grocery store, be sure to pick a pumpkin that is not too hard.

( Remember: Candles require attention – all the time!  )
 If you don’t want to waste your vegetables you can also do something easy like decorating a jar with some leaves and twine.. Fill it with water and add a floating candle.
Can you think of any other vegetables that would be fun to make a candle holder out of?
What do you think – do you like any of my ideas?
I wish you a creative weekend!
Images: Nina Holst

Do you ever make mood boards or inspirational boards? It’s actually great fun and it’s very inspiring and helpful! I created this mood board yesterday to help me get more inspiration to my blogging.
This mood board is made particularly for this autumn and it’s supposed to express how I want my blog to appear, and what I want to focus on.
I arranged everything on the table and took a picture of it so I can use it as a background image on my computer. This way I can use bigger objects in my mood board as well. I don’t have a wall in my office to hang a mood board on either, so a background image is a better solution for me anyway.
What do you think of my mood board? Does it reflect my blog?
I hope to see some of your mood boards as well, and it doesn’t have to be about blogging. If you do make one, please let me know – I would love to see it!
Images: Nina Holst